Affichage des articles dont le libellé est katia. Afficher tous les articles

Mon miroir DIY, dis moi qui est la plus belle ?

While I was cleaning, I found a little mirror hidden somewhere in my bathroom. It wasn't really ugly, but I knew it could have more potential. So, why not give it a second life ?

For this DIY you'll need:

  •  A mirror (Huh...obviously)
  • Yarn, I use a wool yarn but you can use whatever you have at home, such as those we use to make friendship bracelet. It shouldn't be too thin otherwise it would be harder to work on and the result wouldn't be very attractive!
  • A glue gun or a fabric glue. 
  • A rigid or a semi-rigid material such as a hard cover book for example.
  • A pliers
  • Beads (optional) 


Wool "Funky" Katia
The lengh of the yarn depends on the size of the mirror. Here I cut about 24 inches for a radius of 5 inches.


Make a knot. Easy-peasy, right ?

Using the pliers clip the knot to make the braiding easier.

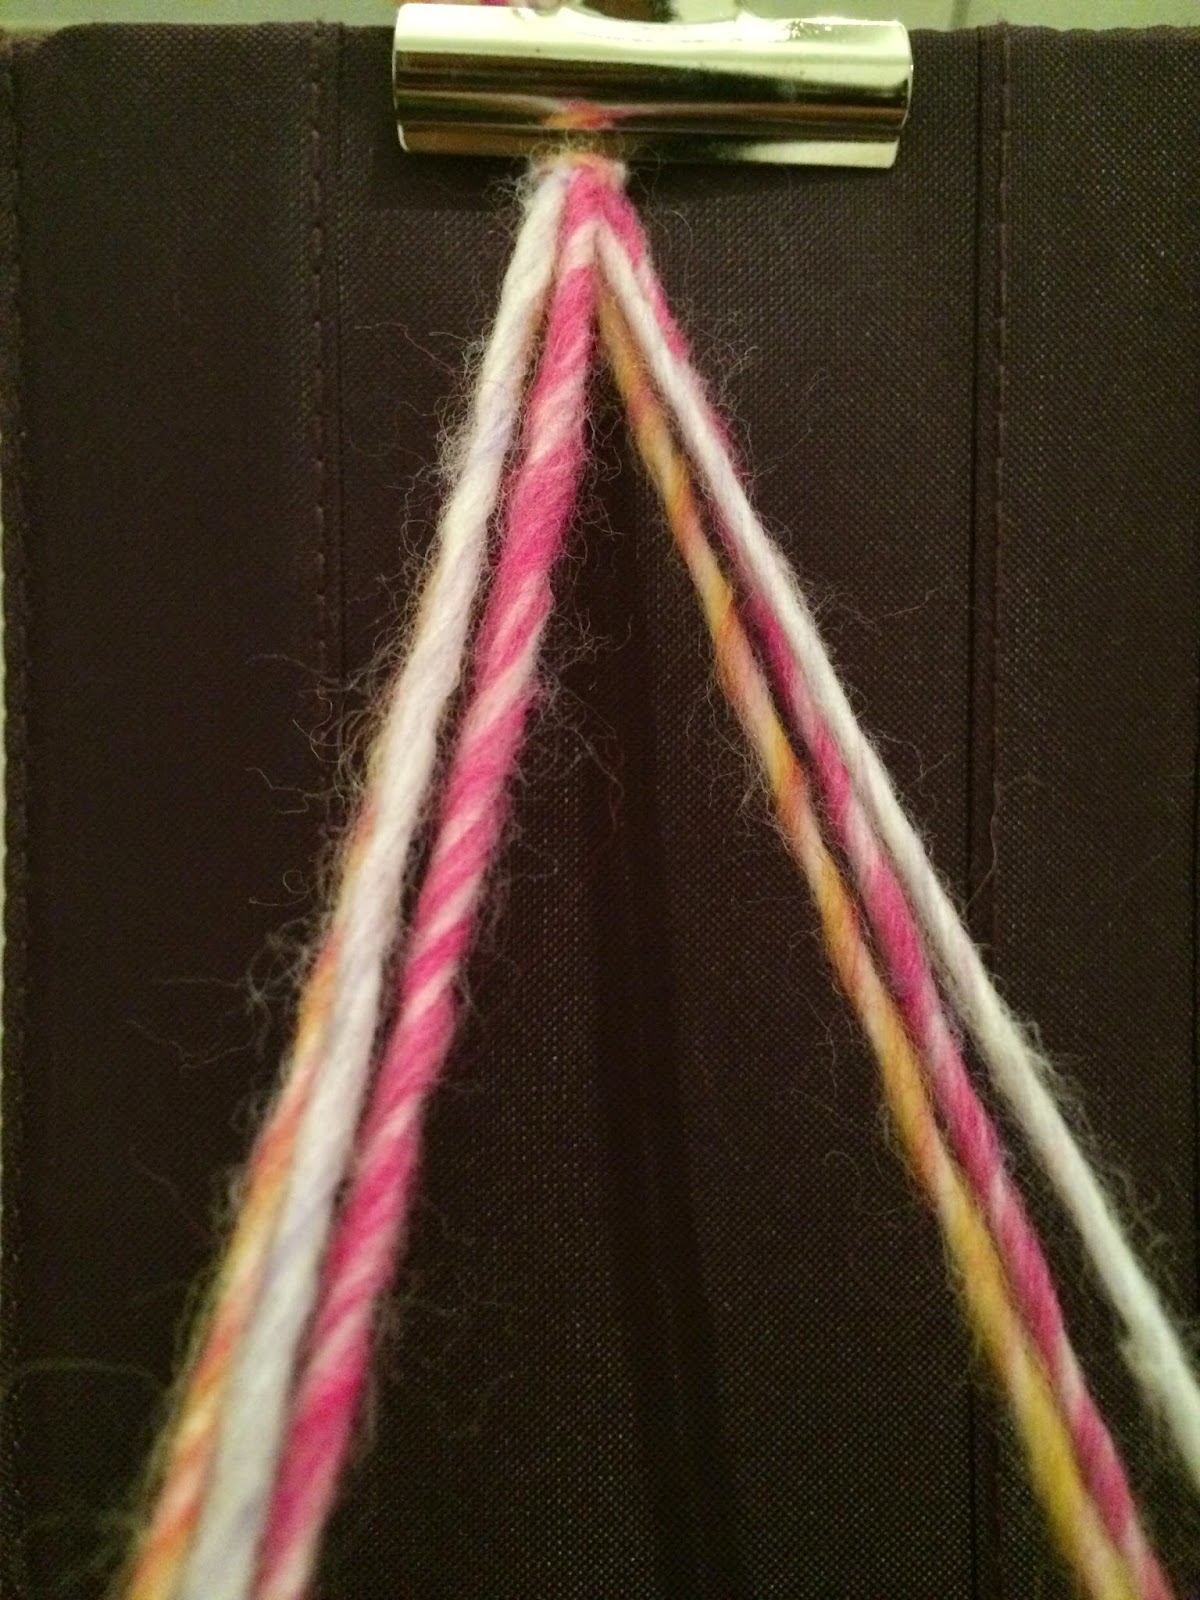
For the type of braid it's up to you (Classic braid, fishtail braid, 5 strand braid or 6 strand braid).
First of all, split your yarns: 3 on the left and 3 on the right.
Choose the order of the yarns as you wish to, I chose white>yellow>pink on the left and on the right.
Behold! It's becoming harder! Just kidding :)  Just imagine the fishtail braid as a Tennis game or a Ping Pong game or whatever game where you have to throw back the ball.
Now, your right hand throw to your left hand its white yarn, then your left hand throw to your right hand its white yarn.
To the next color, your right hand throw to your left hand its yellow yarn, then your left hand throw to your right hand its yellow yarn.
To the next color, your right hand throw to your left hand its pink yarn, then your left hand throw to your right hand its pink yarn.
Voilà! You've completed a row! Keep going until the end on the yarn.
At the end make a knot.

Now, grab your glue gun and glue the braid on the edge.

Done! Not bad, right?
 You can stop here if you want to, and cut the leftover or you can also go on and add beads on it. Again, it's up to you, you can glue beads as many beads as you like, colorful or not.

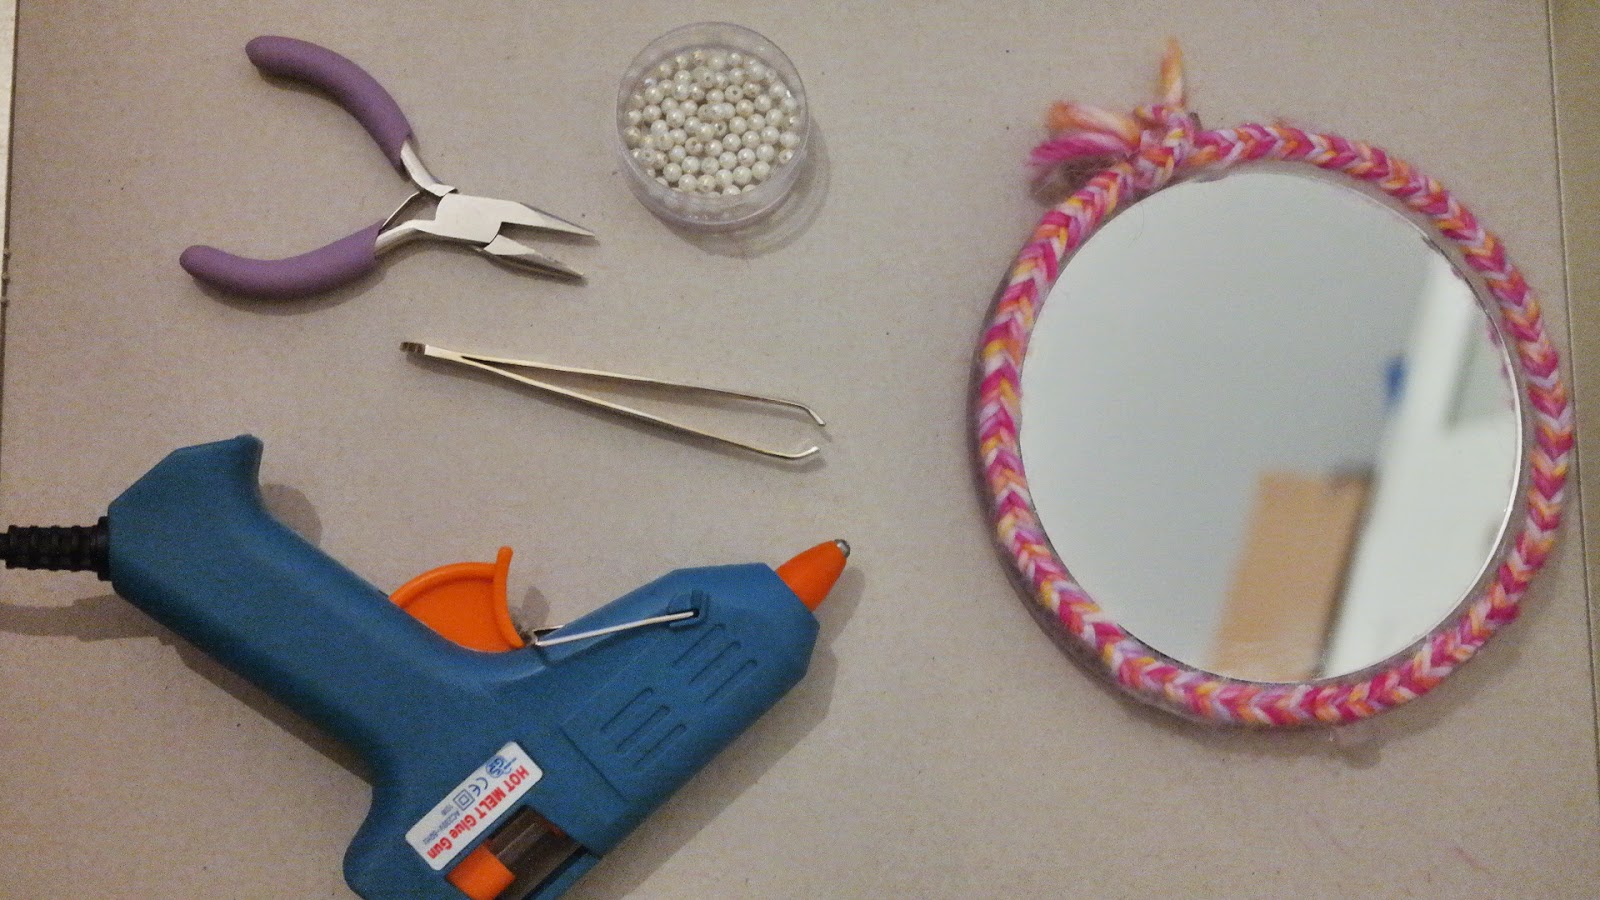
If you have a jewellery pliers at home all the better, otherwise a tweezers will do the job.

Add a hint of glue and glue on the bead. Keep going until you're good with it.


Here you are, a simple and easy DIY with things you can find at home.
I hope that you like the idea, please let me know what you think about it.

Kisses <3

My DIY miror, who's the fairest of them all?


En faisant un peu de rangement, j'ai retrouvé un petit miroir, caché quelque part dans ma salle de bain. Il n'était pas vraiment moche, mais je savais qu'il avait quand même plus de potentiel. Du coup, pourquoi ne pas lui donner une seconde vie?

Pour ce DIY vous aurez besoin de peu choses :

  • Un miroir (Heu...évidemment)
  • Du fil, j'utilise du fil de laine mais vous pouvez parfaitement utiliser ce que vous avez chez vous, comme du fil de coton perlé (ceux qu'on utilise pour faire des bracelets brésiliens). Le but étant qu'il ne soit pas trop fin auquel cas, il sera plus difficile à travailler et le rendu pas très attrayant!
  • Un pistolet à colle ou de la colle pour textile.
  • Un support rigide ou semi rigide
  • Une pince
  • Des perles (facultatif)


Laine "Funky" Katia
La longueur du fil dépendra de la taille du miroir. Ici j'ai coupé environ 60cm de fil pour un miroir de 12 cm de rayon.

Faites un nœud au bout du fil. Simple, non ?

A l'aide de la pince, accrochez les fils à votre support au niveau du noeud, cela rendra le tressage plus facile.

Pour le type de tressage vous avez le champ libre ( Tresse classique, tresse en épi, tresse à 5,6!)
J'ai opté pour une tresse en épi de blé.

Pour commencer, séparez vos fils: 3 à gauche et 3 à droite.
Etablissez l'ordre des fils comme vous le souhaitez, j'ai choisi blanc>jaune>rose à gauche et à droite.
Accrochez vous, c'est maintenant que ça se corse! Je rigole :)  Imaginez la tresse en épi comme une partie de tennis, ou de Ping Pong ou n'importe quel jeu dans lequel il faut se renvoyer la balle.
Maintenant, votre main droite envoie à la main gauche son fil blanc, à son tour la main droite envoie à la main gauche son autre fil blanc.
Changement de fil, la main droite envoie à la main gauche son fil jaune, à son tour la main droite envoie à la main gauche son autre fil jaune.
Changement de fil, la main droite envoie à la main gauche son fil rose, à son tour la main droite envoie à la main gauche son autre fil rose.
Et voilà ! Vous avez complété un rang! Continuez ainsi jusqu'au bout du fil, ou jusqu'à ce que vous atteignez la longueur voulue.


Et voilà! A la fin de la tresse, faites un noeud.

Attrapez votre pistolet à colle et collez doucement le fil sur le bord du miroir.

Lorsque vous avez fait le tour, ça devrait ressembler à ça, pas mal non ?

Vous pouvez vous arrêter ici, et couper les fils trop longs ou alors continuer et y ajouter des perles. Là aussi, faites comme bon vous semble, beaucoup de perles, très peu, très colorées ou alors unies.


Si vous avez une pince à bijoux chez vous tant mieux sinon, une pince à épiler fera l'affaire.

Mettez une pointe de colle et déposez la perle. Continuez ainsi jusqu'à ce que le rendu vous plaise.

Voilà, un DIY tout simple et avec des choses que l'on a chez soi.

J'espère que cet idée vous aura plu, n’hésitez pas à me dire ce que vous en pensez!

Bisous <3