

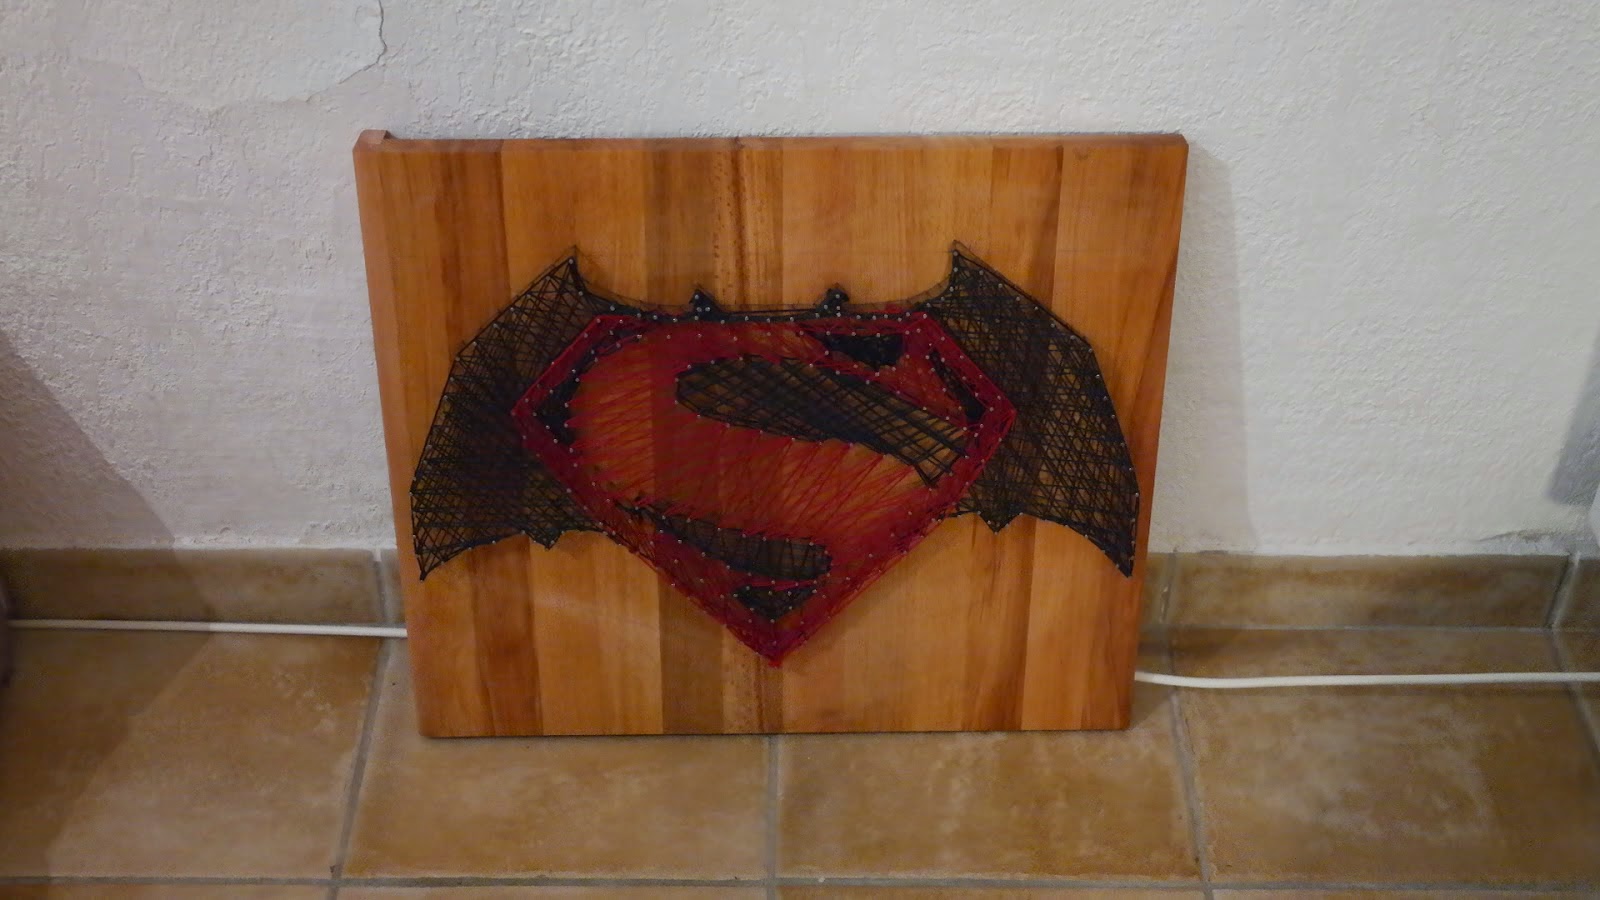
Batman V Superman: Dawn of Justice String Art


This year for Valentine's Day I was inspired by this picture found on Pinterest. I did not want to recreate a state or a country, but something more in relation with the likings of my Valentine. So I went for the futur BatmanVSuperman: Dawn of Justice logo movie.
You will need:
A wooden stand, I bought a cutting board 46x53cm (Ikea)
Flat-headed nails
A hammer
Yarn, I used wool yarn 3,5mm
A template. If the drawing you want to do is not too big, you can print a template to draw the edges on the cutting board, it would be easier and faster this way. I couldn't find a template which was big enough so I had to draw freehand which took more time.
Start by positioning your template on the wooden stand and draw the edges with a pencil.Then grab your hammer and your nails and start by nailing the tip of your design to allow a better definition at the end.Then nail up equidistantly on the lines at equal distance.
When you are done, make a knot on one of the nail and go from nail to nail until you are happy with how it turned out. If you want to do psychedelic effect, do a backward and forward movement going from the first nail where the knot is to the second nail, then back to the first nail and go to the third nail then back to the first nail.... And there you are !


0 commentaires: